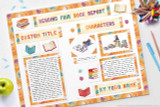
Reading Fair DYI - How to Make a Book Report Display

This tutorial will cover the steps to create a display poster for a Reading Fair project or Book Report. We will be using our printable kit to make this project.
Get the Kit: CLICK HERE. To purchase and download the kit used in this tutorial.

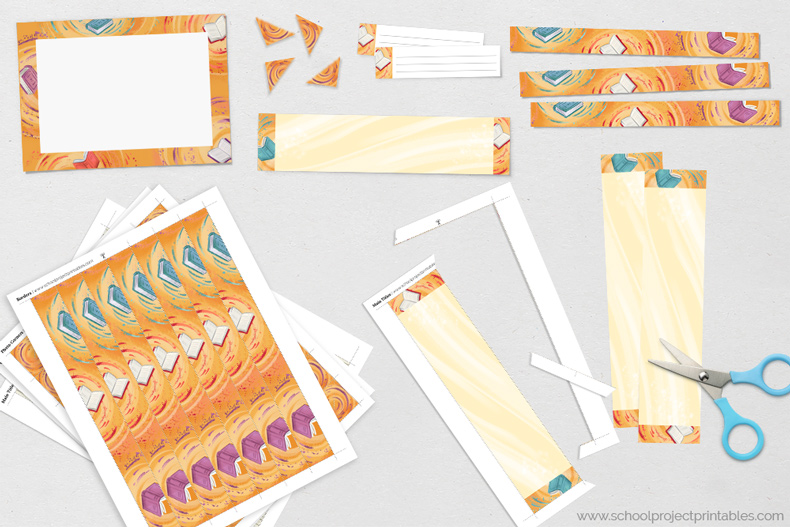
Pieces in the Reading Fair Book Report Kit:
- Title
- Alphabet "Stickers"
- Writing Template (lined, unlined)
- Half Page Writing Template
- Caption Card
- Borders
- Photo Frame
- Photo Corners
- Icons


Supplies to Gather:
You'll need a few supplies in addition to the printable kit. Here is what we recommend:
- Printed Kit
- Assignment (from your school)
- Rough Draft
- Photos, Charts, or Other Images
- Scissors
- Glue Stick
- Pencil or Pen
- Sticky Notes (or scratch paper)
- Poster Board (any size)
Steps
1) Print
The first step is to print out the kit. You can use regular letter size (8.5 x11) copy paper.
- Download your kit files and print, using regular, letter size printer paper.
- The files are organized into several multipage pdf documents, so that it is easy to print only the pages you need.
- Print at home, at work, or at copy shop.
Writing Templates - Before you print the writing templates, you'll need to decide if you are going to type or handwrite your report, and estimate how many pages you need to write.
- Estimate the number of writing templates your project requires.
- If you plan to hand write your report, print the lined templates.
- If you plan to type, print the blank unlined templates (in a later step we will run them through the printer a second time to add the words).

2) Cut
- Cut out just 1-3 of type of each type of piece from the kit.
- You probably won’t need every piece, so it saves time to cut just a few to work with.
- As you go, cut more pieces only as needed.

3) Borders
Borders will make your poster look colorful and professional. We'll add these first because it's easy to decide where they should go, and help us space out all the other pieces. The borders are the only pieces that we recommend gluing down before the very last step (in case you change your mind).
- Align the borders with edge of your board, and glue.
- Tip - It is easiest to overlap the borders at the corners of your board, and wrap the extra around the back instead of cutting it off.

4) Pile
Now we will start organizing the content of your report. You probably already have an idea of what sections you need from doing your research writing your draft, but laying it out visually can be very helpful. Cutting up your rough draft can also give you a good idea of how much space you will need for written sections.
This is a good time to double check your assignment and make sure that you've included all of the required information and sections.
- Cut your rough draft into sections that you will display separately.
- Pile together images, and rough draft pieces that will go together in sections.
- Label with each pile with a sticky note.
- Double check your assignment, do you have everything that was required?

5) Pair
Now you can start to pair the content of your report with the decorative Reading Fair Book Report themed pieces from the kit.
- Sticky Notes
- Pair each sticky note with a title or subtitle.
- Don’t forget your main project title and your name.
- Rough Draft
- Pair with writing pieces with the right amount of space for what you want to write.
- Writing templates - good for full pages of writing.
- Half page writing templates - good for small explanations.
- Caption cards - good for captioning images with short sentences.
- Images
- Pair rectangular images with photo frames (its easiest to just put your pictures on top of the "frame", don't bother cutting out the middle).
- If an image is an odd shape, don’t worry. We will decorate these later with photo corners.

6) Plan
Now we have a really good idea of how much space everything will take up, so we can begin to place the pieces onto the board. Grab your poster board.
- Start laying out your pieces on your board to get an idea of how you want to arrange your pieces.
- Don’t worry if there is a lot of empty space - we have tricks to fill that up later.
- Tip - It looks best to arrange the largest pieces near the bottom of the board.

7) Title
Next, we can use the included alphabet to make custom titles for each of your stick notes. There are some whole words included in the alphabet also, but you'll probably want to make your own custom titles by combining the letters.
- Cut letters from the alphabet. It's easiest to cut out only the ones you need so the rest stay organized. Refer to your sticky notes to see what letters you need to cut.
- Arrange the letters on the title card.
- After you have them arranged the way you like, pick each letter up, one by one, and glue it to the title.

8) Hand Write
If you are typing, skip to the next step. (Note that half pages and captions can’t be typed).
If you are handwriting your report, just copy your rough draft onto the writing templates, half pages and caption cards.

9) or Type
Follow these steps to type your report:
- Take one of the blank writing templates that you printed in step 1. Use a ruler to measure from edge of the paper into the inside of the colored border (this distance will vary a little depending on your printer settings).
- Set the margins of your word processor inside the borders measured.
- Print a test page of your type on regular paper. Place the test page on top of the blank border template. Hold up both sheets to a window or light source. You will be able to see if the words are lining up inside the borders.
- When you are ready, load the writing templates with the borders you printed in step 1 into your printer, and print to add your text.
- Tip - Note the way your printer feeds, all printers are different, and some flip the paper over or output prints upside down. To test how your printer feeds paper, mark an X at the top edge of a piece of paper and print a test page from your report. Note where the X ends up on your sheet.

10) Photo Corners
Adding photo corners is an easy way to make odd sized images look finished and like they belong with the rest of the report. Details like this add a lot to bring your display together visually.
- Just place one photo corner on top of each of the corners of the image. (Its best to wait to the end to glue in case you want to move the image)

11) Icons
Use the Reading Fair Book Report clip art "stickers" from the kit to fill any empty spaces and make your report look colorful and interesting. Use the icons to fill in any spaces that look too empty. Icons can also be used to emphasize a topic section.

12) GLUE!
Finally! When you are sure where you want everything, you can glue. It can be very helpful to take a picture before you start to glue, just in case things get moved around (or your cat jumps on your dinning room table etc.)
- Pick up only piece one at a time (so you don’t forget where it goes) and use a glue stick to glue it to your board.
- Yahoo! You are done. Go turn that project in with pride.

If you post your project on facebook or instagram, tag us @schoolprojectprintables and we'll feature you on our feed ;)


