California Missions Display Board - Project Tutorial
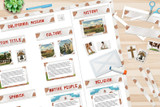
Follow along with this step by step tutorial, to make an outstanding display board for your California Missions project.
This tutorial is designed to help students studying the California Missions, who need to make a visual display board. Use this tutorial as a guide for your California Missions project, whether you have picked one particular mission to study in depth, or you are doing a report on the entire mission system and it's importance in the history of California, and impact on the native peoples.
This tutorial covers the "craft" part of making your display. Researching and writing the content of your report will depend on your assignment from your teacher. If you are just starting your project, click here to visit our California Missions Pinterest Board where we have gathered some resources to help you begin your research.
 About the Printable Kit
We will be using our California Missions Printable Kit for this tutorial. The printable kit has all of the California Missions themed templates, and clip art that you need to make your display. It is a digital download. Purchase the kit, then instantly download the kit files, and print them yourself. No driving, shipping, or waiting!
- How to Download - The link to download your kit files is provided on the order confirmation page, immediatly after purchase. The download link is also emailed to you right after purchase, by our automated system.
- Where to Print - Print the kit at home, at your office, or at a copy shop.
- What Paper to Use - Use your normal printer paper. This is sometimes called letter size, 8.5 x11, A4, or copy weight paper. Any normal printer paper will work.
Download The Kit - Click Here to Purchase and Download the California Missions Kit.
What's Included in Your Printable Kit
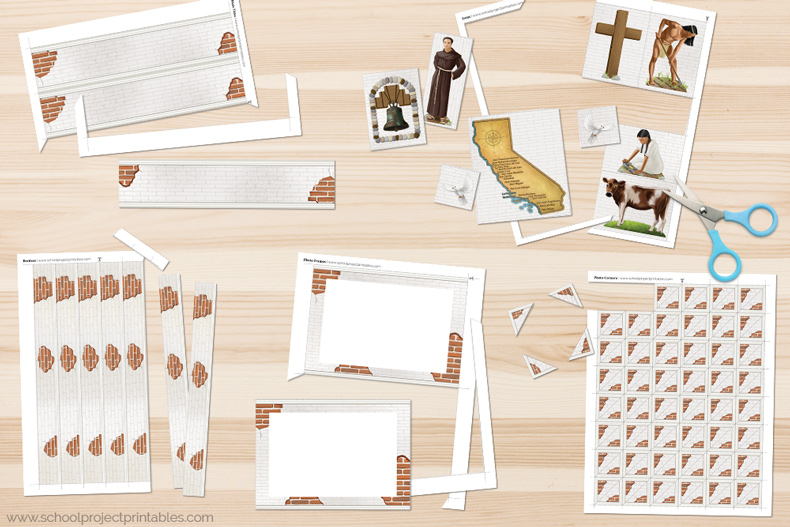
The kit includes over 25 pages of California Missions templates and clip art. Here is a list of the pieces in the kit, after you print and cut them out:
- Borders
- Clip Art
- Title Cards (for custom titles)
- Alphabet "stickers"
- Photo Frames
- Photo Corners
- Writing Template, Full Page
- Writing Template, Half Page
- Writing Template, Caption

You can type, or handwrite - These days, most students prefer to type their schoolwork. Two copies of each writing template are included in the kit; a blank copy and one with printed lines, so you can choose to either type or handwrite your report.
Supplies
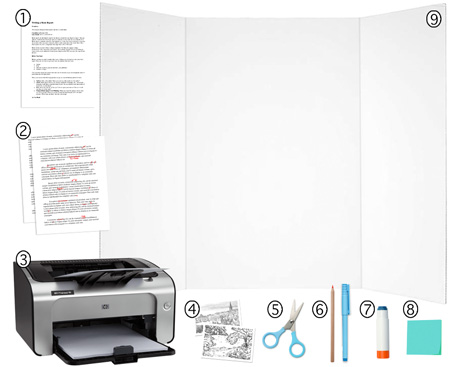
You will also need these supplies to make your poster:
- Your Assignment
- Your Rough Draft
- Printer (at home, work or copy shop)
- Photos or Visual Aids you'd like to add
- Scissors
- Pen, Pencil or Marker
- Glue Stick
- Sticky Notes (or scratch paper)
- Poster Board (see note below about size)
Poster Board - Size & Where to Buy
The pictures in this tutorial show a poster board that measures 36 x 40 inches. This is a standard size for a large, tri-fold poster.
However, the kit works with any kind poster, small or large, flat or folded. Your kit includes enough pieces for a large board, but if you are using a smaller board, you can print and cut out fewer of the templates.
The kit is a digital download, but you will need to buy a physical poster board, either online or from a store. Good places to look for one are office supply stores (Staples, Office Depot), big box stores (Target, Walmart) or even drugstores (CVS, Walgreens).
Instructions - Step By Step
1) Print
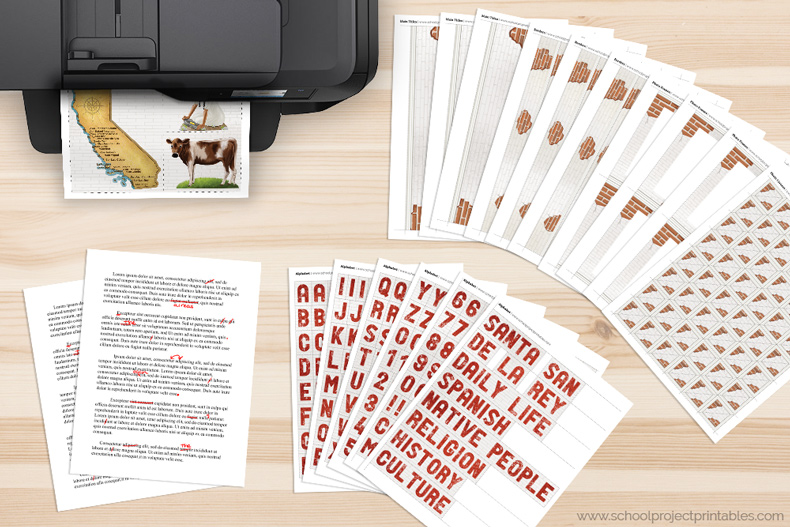
The first step is to print out the kit pieces, and your rough draft. For now, don't print out the writing templates. We'll print the writing templates later for your final draft.
Print these files now:
- Alphabet
- Poster Pieces
- Clip Art
- Your rough draft if you have one (otherwise grab some scratch paper).
For Smaller Boards - The kit includes enough of each piece to decorate a large, tri-fold poster board. If you have a smaller board, you may want to print out fewer pieces.
2) Cut Out Poster Pieces
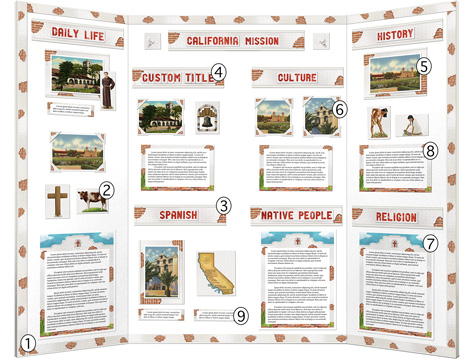
The pieces in the California Missions kit look like white washed adobe brick, the iconic architectural material used to construct the missions. Start cutting out a few of the kit pieces, cutting along the dotted lines. You don't need to cut out all of them, just cut a few to work with, you can always cut out more later if you need them.
Cut out a few of each of these:
- Borders (our example poster uses 18 border pieces)
- Title Cards (our example poster uses 8 title card pieces)
- Photo Frames (our example poster uses 3 photo frames)
- Photo Corners (our example poster uses 16 photo corners)
- Clip Art (our example poster uses all of the clip art)
3) Add the Borders
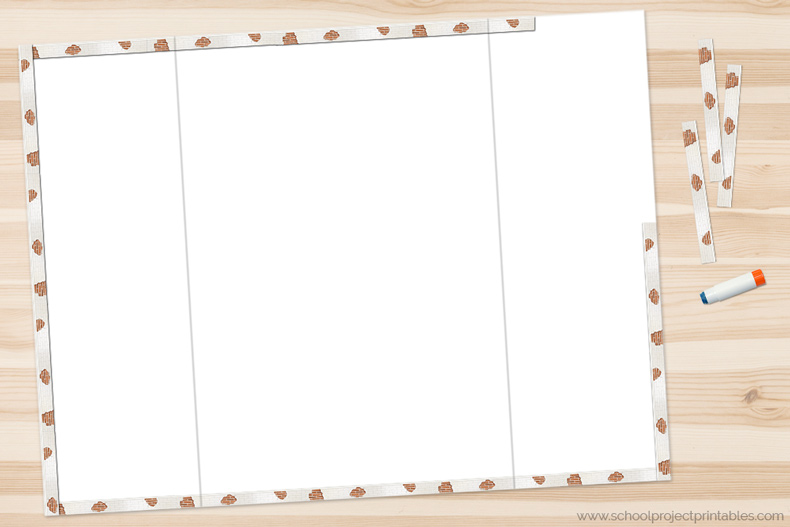
Adding the adobe brick borders will do a lot to give your blank poster a California Missions theme. Adding a border around the edge of your board will also add color and interest to your poster, and make it look more polished and complete.
We'll add the borders first because we know where they go (at the edge), and it will help us plan how to space out all the other pieces. The borders are the only pieces that we will be gluing down now, everything else should be glued only as the very last step, just in case you need to move something.
To add your borders:
- Align the borders with edge of your board, and glue them in place with your glue stick.
- Tip - At the corners, it is easier and more secure to overlap the borders, and wrap the extra around the back of the board, gluing it down to the back, instead of cutting it off.
4) Begin to Organize Your Poster Into Sections
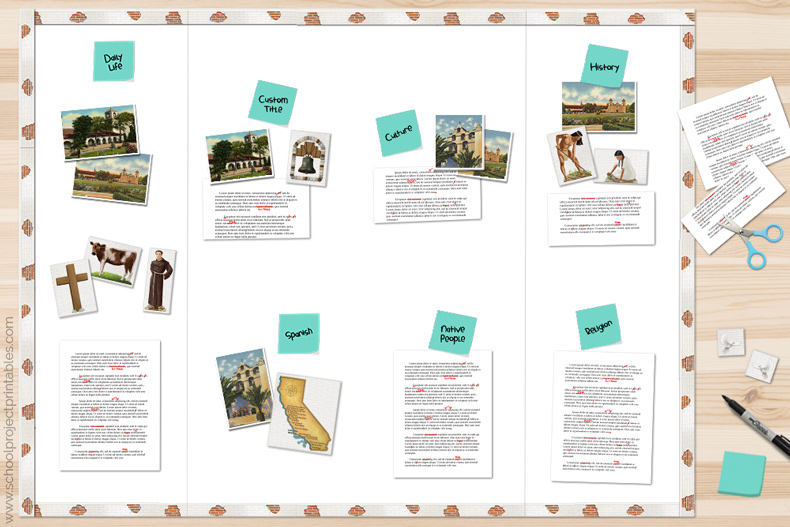
Now you can begin to organize the content of your California Missions report into sections. You probably already have an idea of what sections you'll want to make from your assignment, and from doing your research, and writing your rough draft. Laying the sections out visually now will help you begin decide how to place things on your poster.
This is a good time to double check your assignment and make sure that you've included all of the required information and sections. For example, California Missions assignments often require sections on native people, daily life, the role of the Spanish government and religion, and the history of the mission system. The sections shown in this tutorial are just examples, you can make any sections you want, and we'll explain how to make custom titles in a later step.
Pile together all of the content that will go in each section, including writing, and any photos you have already. Also, look at the California Missions clip art from the kit, and add the clip art pieces to the sections each makes sense with.
To begin organizing your report content:
- Cut your rough draft into pieces, if different parts will go in different sections.
- Pile together the images, and rough draft pieces that will go together in each section.
- Add the clip art from the kit into the sections it matches.
- Label each section with a sticky note, or piece of scratch paper.
- Begin to lay each section on your on your board, but don't worry about placing things exactly right. Just put similar things together, to see how much space each section will need.
- Double check your assignment, do you have everything that was required?
5) Add a Title Card for Each Section
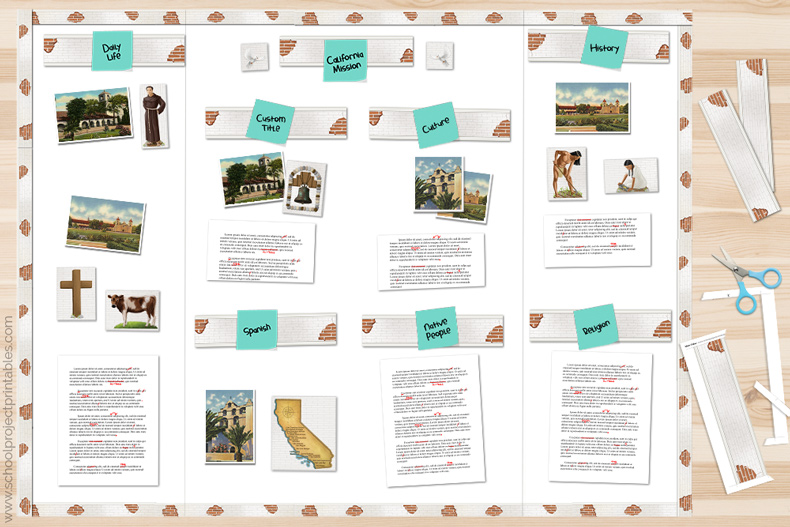
Now, add a blank title card from the kit for each section. The titles also have adobe brick artwork to match the theme. We will make custom titles using the alphabet in the next step. For now, stick your sticky notes (or scratch paper) to the title cards to remind you which is which. This will help you to start to visualize how each section will fit on your display.
To add title cards:
- For each of your sticky notes with your section names, add a title card from the kit onto your board.
- Also add a main title for your report in the center at the top (usually the name of the mission you are researching).
- Tip - You can overlap two or more title cards to make longer titles. For example, if you need to write "Basilica San Diego de Alcala", put a few title cards together to make it long enough.
6) Make Custom Titles
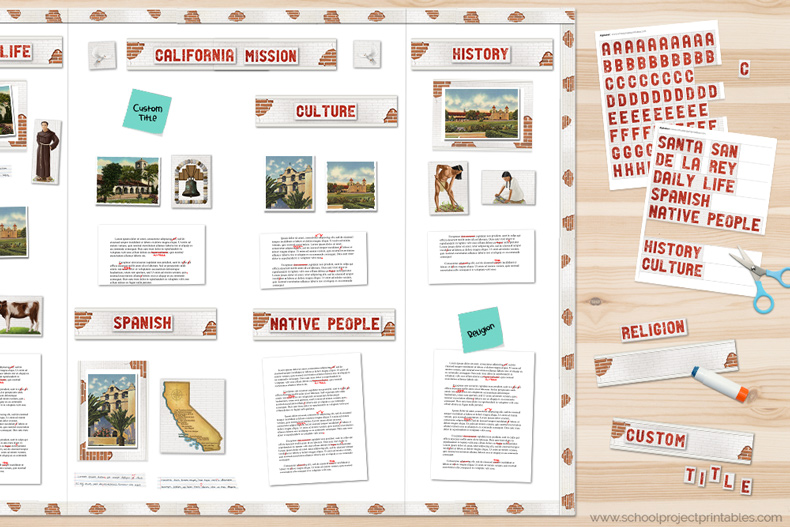
Now we will use the alphabet "stickers" in the kit to make custom titles, matching what you have written on each of your sticky notes. Each letter is used just like a "sticker". The last page in the alphabet includes some pre-written common California Missions terms, such as History, Native People, Daily Life, Culture and Spanish.
To make your custom titles:
- Look at the section title written on your sticky note, and cut out each letter you need to spell it.
- Tip - It's easiest to cut out only the letters you need, so the rest stay organized. Don't cut out all the letters, you won't need them all.
- Arrange the letters on the title card.
- After you have them arranged the way you like, centered and neat, pick each letter up, one by one, and glue the letter to the title (but don't glue the title to the board yet).
- Place the title back on the board, with it's section, but don't glue it down.
7) Add Photo Frames, Photo Corners and Captions to Your Images
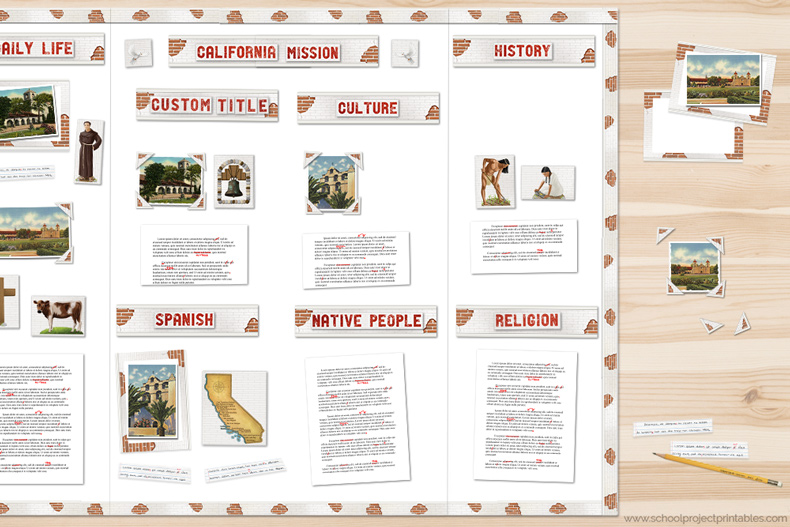
This is starting to really look like a California Missions project! Next we will plan the pictures and images ("visual aids") that go in each section. Use the adobe brick photo corners and photo frames to decorate your pictures to match the rest of your board, and also begin to think about adding captions to your pictures.
First, look at your board and decide if there any more any more photos, charts, maps, or other images you want to add. Get them together, and put them in the sections they go with.
To add your visual aids:
- Photo Frames - These add a nice border around photos that are close to a standard size, about 5x7 or 4x6 inches. Place the photo on top of the "frame" (don't cut out the middle).
- Photo Corners - Perfect for any size image, just put one on each corner of your image.
- Captions - These will just be a rough draft for now (we'll make the final captions later). Use a piece of scratch paper to write any captions you want to include under your pictures, and put it on the board under the picture.
8) Writing Templates
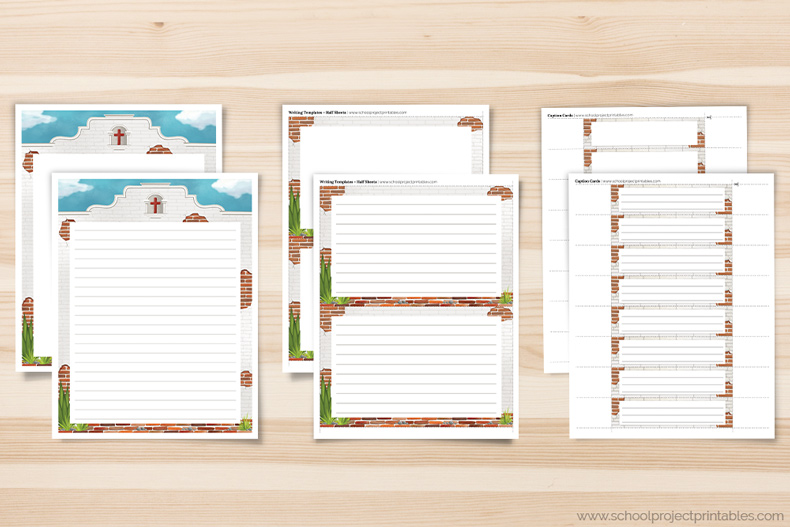
Now we can start thinking about making the final draft of any writing in your project. You kit includes three kinds of writing templates, for different amounts for writing:
- Full Page - Use for parts of your report that need full pages of writing.
- Half Page - Use in areas that require less than a full page of writing.
- Caption Cards - Use these to create a final draft of any captions you want to add.
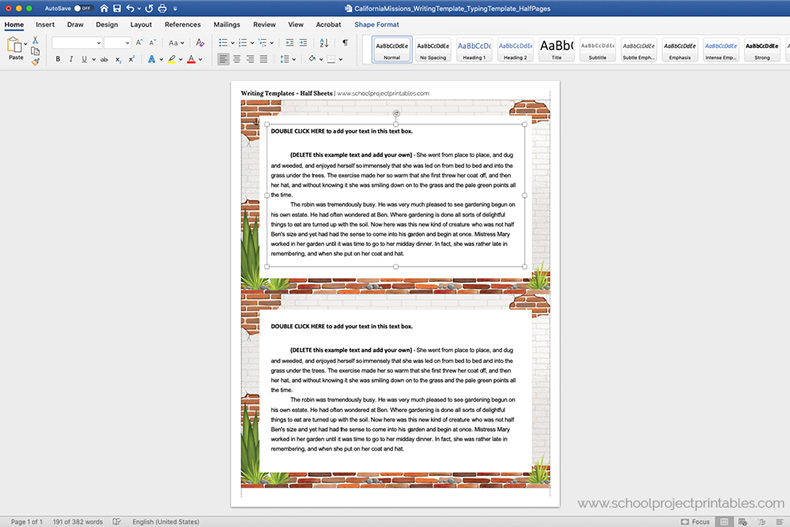
The kit includes two versions of each of these different size writing templates. One set has lines, so you can handwrite your report. The other set are blank Microsoft Word documents, so you can type your report. Most students type their reports. To type, continue to step #10.
9) Handwriting Your Report (Skip to Step 10 for typing instructions)
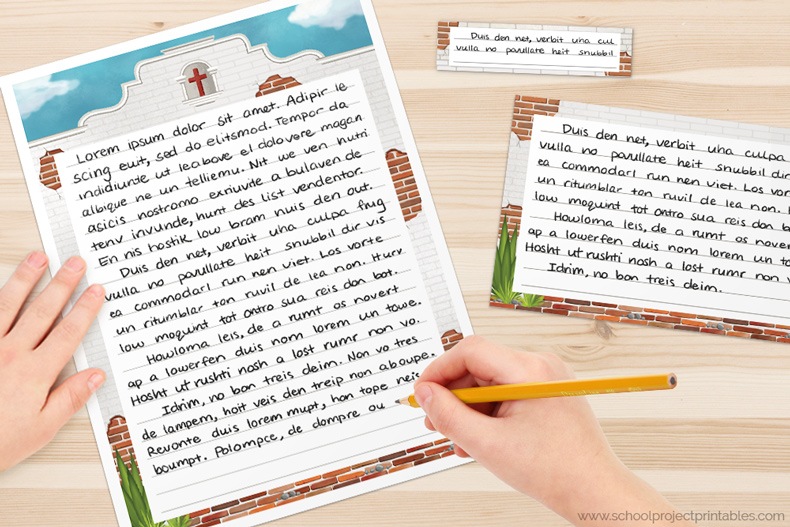
If you are handwriting your report, look at your board and count out how may writing templates you need. Print the lined templates, and carefully copy your rough draft onto the writing templates by hand.
10) Type & Print Your Final Draft
For this step, you will need Microsoft Word, Apple Pages, or another word processing program. The kit includes editable templates that you can copy and paste your writing into.
To type your California Missions report on the templates:
- Open the blank writing templates using a word processing program (Microsoft Word is recommended).
- Each template has example text in text boxes. Copy and paste from your corrected rough draft to replace the text in each text box with your own writing.
- Try not to move the artwork under the text boxes. If you do accidentally move it, just click undo.
- Once you are finished editing, print your final draft pages.
11) Add Your Final Draft and Finish Arranging Your Board
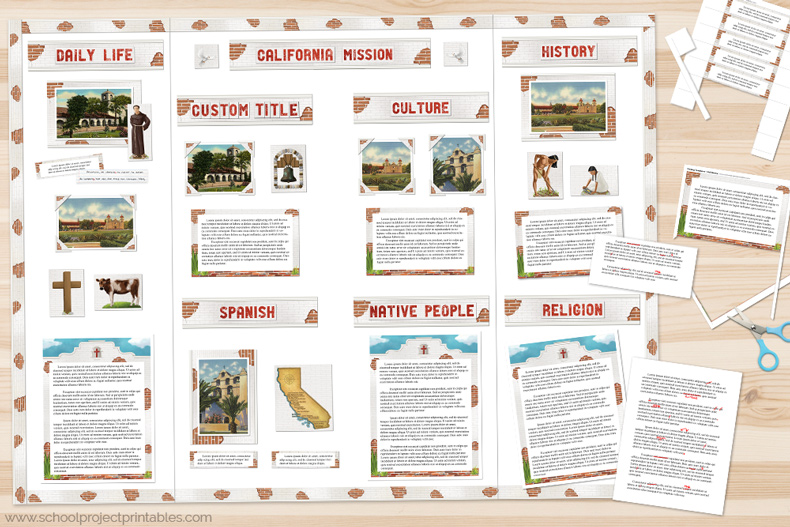
Whether you hand wrote or typed your report, you can now replace the rough drafts on your board with your final drafts, and decide the final arrangement of all the pieces on your board.
To finish arranging your poster:
- For half page writing templates and captions, cut out each piece along the doted lines. (Full page writing templates don't need to be cut).
- Remove each rough draft from your board, and replace it with the final draft piece.
- Make any final adjustments to the placement of everything else on your board. Make sure you like it, we are about to glue!
12) Glue
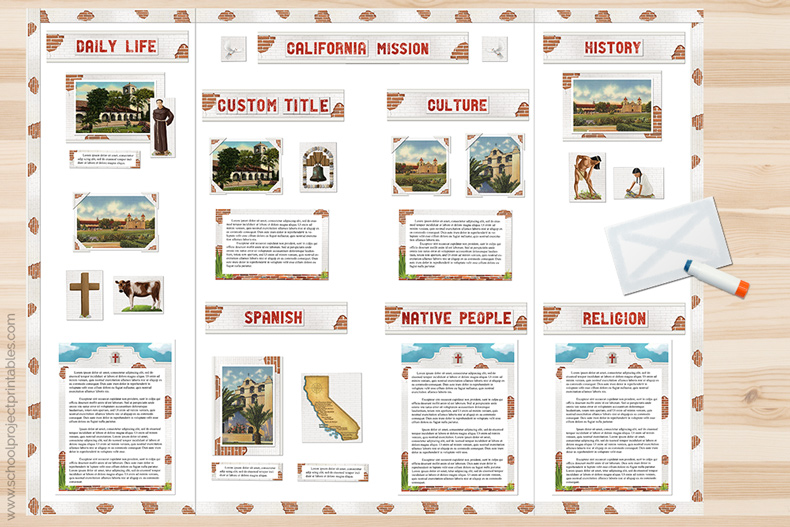
Once you are sure everything is how you like it, you can glue. It can be very helpful to take a picture before you start to glue, just in case things get moved around (or your cat jumps onto your project).
- Take a picture of your board before you begin, just in case.
- Pick up only piece one at a time (so you don’t forget where it goes) and use a glue stick to glue it to your board.
- And you are done! You just need to go turn in your amazing project. Don't forget to write your name on it, you are going to want credit for this ;)
If you post your project on social media, use #schoolprojectprintables, we'd love to see them!
