Ancient Greece Poster Project Tutorial

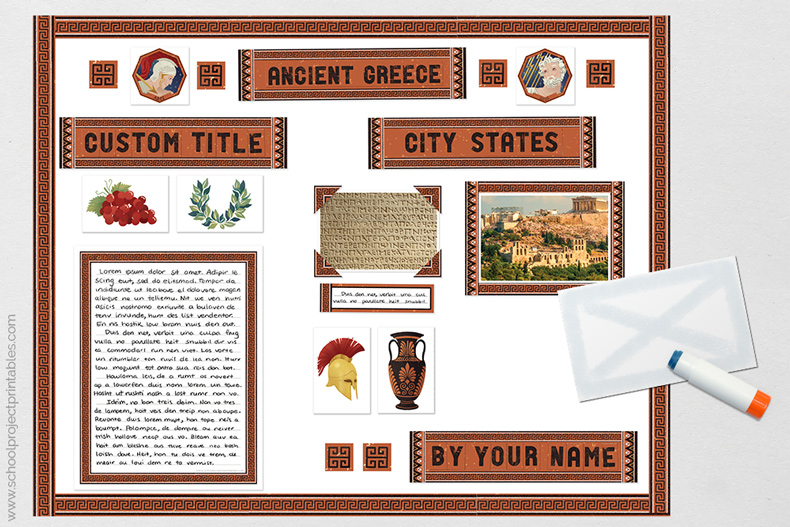
Hi! This tutorial will show step by step how to make a poster for your school project on Ancient Greece! We will be using our printable kit for this project.
Get the Kit: The CLIK HERE to get the Ancient Greece Printable Kit . The kit is a digital download that can be purchased in our online store. You can download it, print it, and get started immediately.

Pieces in our States Report Kits:
- Title
- Alphabet "Stickers"
- Writing Template (lined, unlined)
- Half Page Writing Template
- Caption Card
- Borders
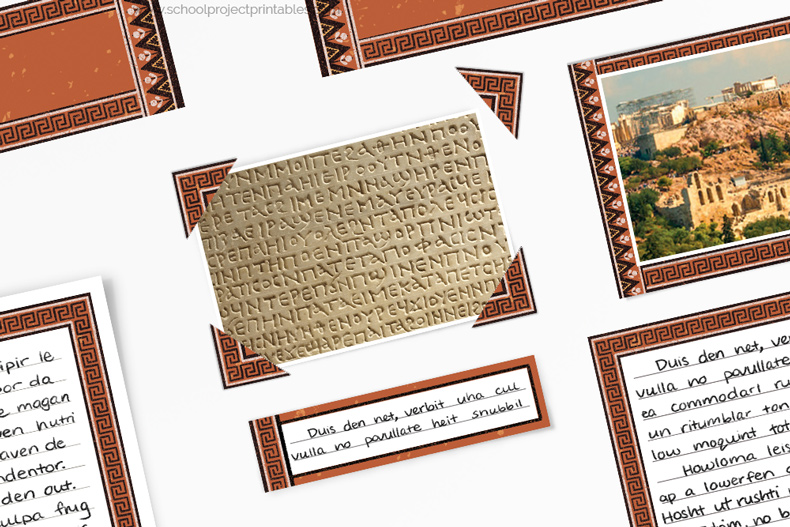
- Photo Frame
- Photo Corners
- Icons


Supplies to Gather:
- Printed Kit
- Assignment (from your school)
- Rough Draft
- Photos, Charts, or Other Images
- Scissors
- Glue Stick
- Pencil or Pen
- Sticky Notes (or scratch paper)
- Poster Board (any size)
Steps
1) Print
- Download your kit files & print on regular printer paper.
- The files are organized into several multipage pdf documents, so that you only need to print the pages you need.
- Print at home, work, or a copy shop.
- Writing Templates
- Estimate the number of writing templates your project requires.
- If you plan to hand write your report, print the lined templates.
- If you plan to type, print the blank unlined templates (in a later step we’ll run them through the printer a second time to add the words).

2) Cut
- Cut out just 1-3 of type of each type of piece from the kit. You probably won’t need every piece, so it saves time to cut just a few to work with.
- As you go, cut more pieces only as needed.

3) Borders
Borders will make your poster look colorful and professional.
- Align the borders with edge of your board, and glue.
- Borders are the only pieces you should glue to your board before the last step, since you know for sure where they go. (If you want to put them somewhere else besides the edge of your board, wait to glue just in case)
- Tip - It is easiest to just overlap the borders at the corners of your board, and wrap the extra around the back.

4) Pile
What part of the Ancient Greece is your project about? Is there specific information about Rome that your assignment requires you to research, such as the history of the military, daily life, or governemnt? You will want to divide your board into sections that make sense for the topic of your report.
- Divide up your rough draft and image pieces into piles by the sections you want to have on your board.
- Label with each pile with a sticky note. It can help to cut up your rough draft.
- Don’t worry about the kit pieces yet. Just work with your report content for this step.
- Double check your assignment, do you have everything that was required?

5) Pair
Now you can start to pair the content of your report with the decorative Ancient Greece themed pieces from the kit.
- Sticky Notes
- Pair each sticky note with a title or subtitle.
- Don’t forget your main project title and your name.
- Rough Draft
- Pair with writing pieces with the right amount of space for what you want to write.
- Writing templates - good for full pages of writing.
- Half page writing templates - good for small explanations.
- Caption cards - good for captioning images with short sentances.
- Images
- Pair rectangular images with photo frames (its easiest to just put your pictures on top of the "frame", don't bother cutting out the middle).
- If an image is an odd shape, don’t worry. We will decorate these later with photo corners.

6) Plan
Now we can plan out where to put things on your board.
- Start laying out your pieces on your board to get an idea of how you want to arrange your pieces.
- Don’t worry if there is a lot of empty space - we have tricks to fill that up later.
- Tip - It looks best to arrange the largest pieces near the bottom of the board.

7) Title
Use the alphabet to make a title for each of your sticky notes.
- Pre-Written Titles
- The kit alphabet includes some Ancient Greece key terms to help you make titles faster (such as Governemt, Military, Daily Life, and Religion).
- Use these alone or combine with letters to make custom titles.
- Custom Titles
- You can use the alphabet letters to make any custom headers you need for your report. For example, you may want to make custom titles for the name of a specific state like "Daily Life in Ancient Greece".
- Cut letters from the alphabet. It's easiest to cut out only the ones you need so the rest stay organized.
- Arrange the letters on the title card.
- Pick each letter up, one by one, and glue it to the title.

8) Hand Write
- If you are handwriting your report, just copy your rough draft onto the writing templates, half pages and caption cards.
- Tip - To type skip to next step. (Half pages and captions can’t be typed)

9) or Type
Follow these steps to type your report:
- Take one of the blank writing templates that you printed in step 1. Use a ruler to measure from edge of the paper into the inside of the colored border (this distance will vary a little depending on each customer's printer settings).
- Set the margins of your word processor inside the borders measured.
- Print a test page of your type on regular paper. Stack the test type sheet on top of the blank border template. Hold up both sheets to a window or light source. You will be able to see if the words are lining up inside the borders.
- Mind the way your printer feeds, all printers are different and some flip the paper over or output prints upside down. To test how your printer feeds paper, mark an X at the top edge of a piece of paper and print a test page from your report. Note where the X ends up on your sheet.
- When you are ready, load the writing templates with the borders you printed in step 1 into your printer, and print to add your text.

10) Photo Corners
- Oddly sized images or diagrams that don’t fit well on the photo frames can be embellished with photo corners instead.
- Just place one photo corner on top of each of the corners of the image. This is an easy way to make images look nice and finished.

11) Icons
Use the Ancient Greece themed clip art "stickers" from the kit to fill any empty spaces an make your report look colorful and interesting. Use the icons to fill in any spaces that look too empty. Icons can also be used to emphasize a topic, for example you can put the economic export clip art in your section on the economy.
The kit includes the following clip art:
12 Ancient Greek gods and goddesses:
- Zeus
- Hera
- Dionysus
- Ares
- Athena
- Demeter
- Apollo
- Artemis
- Hermes
- Poseidon
- Aphrodite
- Hestia
Clip art of these Ancient Greek Icons:
- Grapes
- Laurel Wreath
- Olive Branch
- The Acropolis (Parthenon)
- Spartan Soldier's Helmet
- Greek Drama Theatre Masks, Tragedy and Comedy
- Greek Pottery (amphora)
- Ancient Greek meander (fret) designs

12) GLUE!
- Make sure you have all the pieces arranged the way you like them.
- If you can, take a picture before you start to glue, just in case things get moved around.
- Pick up each piece one at a time (so you don’t forget where it goes) and use a glue stick to glue it to your board.
- Yahoo! You are done. Go turn that project in with pride.

If you post your project on social media, tag us and we'll feature you on our feed ;)
